
Dimensions: about 9,5 cm (3,75 inches) long by 5 cm (2 inches) wide (sole)
Needle size: 4mm – US 6 (and 3,5 mm – US 4)
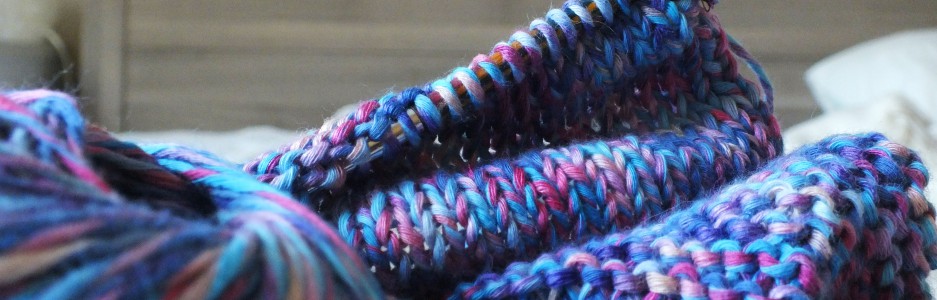
Yarn: Schoeller und Stahl Merino Mix (or any other Aran (8wpi) yarn), you will need less than 50 g
Construction: You start knitting the sole back and forth. After you picked up stitches around the edge of the sole, you join in-the-round and shape the shoes with decreases. You complete the booties by working the cuff ribbing. The entire construction is seamless.
Abbreviations:
- st(s) = stitch(es)
- k = knit
- m1 = make 1
- k2tog = knit 2 together
- p = purl


Pattern:
Sole: With 4mm/US 6 cast on 6 sts. (knit back and forth)

- Row 1: k all (WS)
- Row 2: k1, m1, k4, m1, k1 (8 sts)(RS)
- Row 3: k all
- Row 4: k1, m1, k6, m1, k1 (10 sts)
- Row 5 – 33: k all (now the work has 17 garter stitch ridges and is about 8 cm (3,15 inches) long)
- Row 34: k1, k2tog, k4, k2tog, k1 (8 sts)
- Row 35: k all
- Row 36: k1, k2tog, k2, k2tog, k1 (6 sts)
- Row 37: k all
Now the work measures approximately 9 cm (3,5 inches) by 4.5 cm (1,75 inches).
Shaping the shoe and cuff ribbing: Join in-the-round.


- After finisching the first part, you pick up 40 sts around the edge of the sole (from the wrong side of the work): 18 sts from each side and 4 sts from the edge of the cast-on. With the 6 sts of the first part, now you have 46 sts in total on your needles. (Note: Don’t worry, if you haven’t picked up the exact number of stitches. You can correct it later before the ribbing.) Now you join in-the-round. (Mark the beginning of the round, in the second picture it is up in the right corner. There, the heel will be later.)
- Round 1: p all
- Round 2 – 6: k all
- Round 7: k 26, place marker (it marks the middle of the toe), k to the end of the round (if you have a different number of stitches on your needles, you have to adjust the placement of the marker)
- Round 8: k to 6 sts before marker, k2tog 3 times, slip marker, k2tog 3 times, k to the end of the round (40 sts)
- Round 9: k all
- Round 10: k to 6 sts before marker, k2tog 3 times, slip marker, k2tog 3 times, k to the end of the round (34 sts)
- Round 11: k all
- Round 12: k to 6 sts before marker, k2tog 3 times, slip marker, k2tog 3 times, k to the end of the round (28 sts)
- Round 13: k all (Note: This round is a preparation for the cuff. It may be necessary to increase or decrease the number of stitches to a multiple of 4 for a 2×2-rib, or if desired, to an even number for a 1×1-rib.


Now work k2/p2 (this was my choice) or k1/p1 ribbing for 7 cm (2,75 inches). You can change to a smaller needle size (3,5 mm/US 4 for example), if you prefer a tighter cuff. (I knit very tightly, so I did not change the needle size.) Bind off loosely and weave in the ends. Work the second shoe just the same.
Happy knitting!

I love this pattern but the site won’t let me copy and paste it so I can make a pair. How can I get a copy?
There is a print-button below the post. You find it under „Teilen mit“ on the right side. I hope this is helpful.
Ines
awesome have printed a copy to try out
thank you
Why is it that the 2nd shoe is exactly like the 1st? I would have thought with 46 stiches around, the 1/2-way point is 23. So if the center of the toe on the 1st shoe is placed at the 26th stitch, shouldn’t the 2nd shoe be a mirror image and have the center placed at the 20th stitch?
You start the round not exactly at the middle of the heel. That is why the center of the toe is at the 26th stitch and not at the 23rd. And you can not knit the other way round. So the 2nd shoe is not a mirror image of the first one. I hope this helps.
Hi
I tried to make the same pattern, but I’m little confused whether I should repeat the round 13 for some more rows, in order to get the finished pattern as yours.
Hi,
it is not necessary to repeat round 13. It is only a preparation for the cuff to get the right stitch count. After that you work the ribbing in the round as long as you like. Mine was 7 cm. Good luck.
Hi! Beautiful pattern! I tried it out today with great results. It will be a baby shower gift tomorrow. I hope to use it often.
Thank you!!
Hi, Ines! Just a small question if you don’t mind. Do you count the cast on ridge as part of the 17 garter stitch ridges? Thanks for your help!
Hi, thank you for your question! No, I don’t count the cast on ridge to the 17 garter stitch ridges. But it can depend from which side of the work you count. I hope this helps.
Happy knitting!
Hi Ines, lovely pattern, thank you. I have made a pair and need to make another pair for identical twin girls, but I feel I’ve fudged it by not really knowing where the beginning of the round is. The pattern made me deduce that it was at the top right corner in the picture titled ’46 Maschen auf den Nadeln‘ and the next round says to purl all, but I can’t work from there because the working yarn is in the wrong place – at the other end of those 6sts (top left of sole). And if I do carry on from where the yarn is, then I haven’t purled the 6sts on the needle, unless I purl the first 6 sts of round 2. So, the trouble I’m having is where you say ‚ (Mark the beginning of the round. There, the heel will be later.)‘ I’m just not sure where that’s meant to be – the beginning of those 6 sts or the end.
BUT, all this could be straightened out if the instruction to pick up 40 sts should actually read ‚pick up AND KNIT‘ 40 sts. Is that what I what I should be doing? And then on Round 1, I can purl all from the top right corner of the sole because my working yarn will be in the right place.
The first pair I did as in the first paragraph and the second one I’ll do as in this second paragraph and see how it turns out.
Many thanks!
Helen.
Hi Helen!
Thank you for your question. As I can see you are not the first person who is a little bit confused about the beginning of the round. In the part „shaping the shoe and cuff ribbing“ you can see the yarn in the right picture up in the right corner (the yarn below is the yarn from the cast-on). There starts the round and there you place the marker. So the beginning of the round is the beginning of those 6 stitches on the needle. Now you purl all stitches (counterclockwise). Note: In the picture you look at the bottom of the to-be-sole, not at the inside of the to-be-shoe.
I hope this helps.
Ines
I really want to try these but I only have 16 inch circulars. When working in the round, is it done on that size or something smaller like 9 inches?
You can use 16 inch circulars with the magic loop method.
https://www.garnstudio.com/video.php?id=120&lang=en
I hope it helps! Good luck.
I figured it out–dpns will work!
Hi!
Any tips on blocking these? Thanks!
Hi, I think stuff with paper will work.
Is there any adaptation of this pattern to make 12 months size booties? Thanks, beautiful pattern 🙂
Hi, thank you. Have a look on ravelry. There are a lot of people who have made an adaption of this pattern for a toddler size! 🙂
https://www.ravelry.com/patterns/library/baby-hausschuhe/people
What size baby would these fit? Up to 3months or 3-6months?
Thanks,
Kat
0-3 months
Hi, What size baby are these for? 0-3 or 3-6months? Thanks
0-3 months
This pattern is wonderful! No seaming, gorgeous booties, quick and easy to knit, and it seems that they will actually stay on a baby’s feet! Just beautiful! Thank you!
Hi- I am just finishing up my first bootie and I love it. Can you please let me know how you did the bind off on yours? Most stretchy bindoffs make a „ruffle look“ and I don’t want that. Yours is so nice and clean. Thanks!
Hi, I did the „normal“ bind off but with bigger needles. It is not as stretchy as many other bind offs but as you say it looks cleaner. Good luck!
Hallo Ines!
Ich versuche gerade zum dritten Mal verzweifelt, diese süßen Schühchen zu stricken. Leider werden meine immer viel zu groß, obwohl ich exakt die Wolle und ein 4er Nadelspiel verwende. Ich schaffe es auch mit anderer Wolle und kleineren Nadeln nie, deine Größenangaben zu erreichen.Kannst du mir helfen? Was mache ich falsch? Ich habe mal auf deinem Bild die Reihen der Sohle gezählt und komme nur auf 20, obwohl es ja eigentlich 37 sein sollen.
Liebe Grüße und danke im Voraus!
Ruth
Was du auf dem Bild als 20 zählst sind die Rippen, also Vor- und Rückreihen. Zähle einfach für jede Rippe 2 Reihen.